How to Install Laminate Flooring Over Concrete
Laminate is one of the most requested floors in Dubai renovations for a simple reason: almost every apartment and villa here sits on a concrete slab, and laminate is one of the easiest, cheapest ways to get a warm, wood-look floor over that slab without the humidity problems real hardwood runs into.
Quick answer: yes, laminate installs directly over concrete, and it’s a standard, well-proven combination — but only if you test the slab for moisture first, level any dips or high spots over roughly 3mm, and use the right underlayment. Skip any of those three, and the most common failures are a laminate floor that bows, gaps, or clicks loose within a year. The step-by-step process, with the specs that actually matter, is below.
In This Guide
- Why laminate suits a UAE concrete subfloor
- Testing the concrete for moisture
- Tools and materials you’ll need
- Step-by-step installation
- Common mistakes to avoid
- Maintenance in a UAE climate
- FAQ
Why Laminate Suits A UAE Concrete Subfloor
Concrete is what almost every residential building here is built on, and laminate’s click-lock design was engineered specifically to “float” over a subfloor like that rather than being glued or nailed down — no structural changes needed, and it copes with the daily air-conditioning-to-outdoor-heat swing better than solid hardwood does.
- Looks like real wood at a fraction of hardwood’s cost per square metre.
- Doesn’t fade the way some materials do under strong sun through south-facing windows.
- Click-lock installation is fast — a standard apartment room is typically a one-day job for an experienced installer.
- Works in apartments, villas, and offices alike, as long as the concrete prep below is done properly.
Testing The Concrete For Moisture
This is the step that actually determines whether your floor lasts — concrete slabs hold residual moisture from construction for months or years, and that moisture is what causes laminate to swell, bow, or develop a musty smell underneath.
The quick DIY check: tape a 60cm × 60cm sheet of plastic to the concrete, sealed on all edges, and leave it for 24 hours. Condensation on the underside of the plastic or a darkened patch of concrete means the slab is too damp to install on yet.
The accurate check: a calcium chloride test or an electronic moisture meter, ideally run by your installer. Industry guidance generally puts the ceiling at around 4.5% moisture content for a concrete subfloor before laminate goes down safely — a plastic-sheet test can tell you “yes there’s a problem,” but only a meter or calcium chloride test tells you the actual number, which matters if you’re close to the limit rather than obviously fine or obviously wet.
If the slab tests damp, the fix is a vapor barrier underlayment rated for concrete — don’t skip straight to installing and hope for the best.
Tools And Materials You’ll Need
- Laminate flooring planks (buy 5–10% extra for cuts and waste)
- Underlayment with a built-in vapor barrier, or a separate 6-mil (0.15mm) polyethylene sheet plus a standard foam underlayment
- Tape measure and pencil
- Utility knife or laminate/jigsaw for cuts
- Spacers (8–10mm, for the expansion gap)
- Tapping block and pull bar
- Rubber mallet
- Broom or vacuum, and a moisture meter or calcium chloride kit if testing yourself
Step-By-Step: Installing Laminate Over Concrete
Step 1: Clean And Inspect The Concrete
Sweep or vacuum away all dust, dirt, oil residue, and any old adhesive or paint. Laminate underlayment needs to sit flush against the slab — anything trapped underneath telegraphs through as a bump or a hollow-sounding spot later.
Step 2: Test For Moisture
Run the plastic-sheet check above at minimum, or have your installer run a calcium chloride test. Do this before you buy underlayment, since a damp slab changes which underlayment you need.
Step 3: Level The Surface
Check for cracks, holes, and high or low spots with a long level or straightedge. Anything more than about 3mm out over a 2-metre span should be corrected with a self-leveling compound — laminate’s click-lock joints put real stress on an uneven subfloor, and that’s one of the more common causes of a floor that clicks or separates at the seams within months.
Step 4: Install The Underlayment
Roll out the underlayment in one direction across the room, butting edges together without overlapping, and tape every seam. If you’re using a separate vapor barrier sheet under foam underlayment, make sure the plastic sheet itself is also taped and slightly runs up the wall at the edges (the skirting board will cover it later).
Step 5: Let The Laminate Acclimate
Bring the sealed boxes into the room and leave them unopened for 48–72 hours before installing, so the material adjusts to the room’s actual temperature and humidity. This step gets skipped more than any other on this list, and it’s the single biggest reason DIY laminate jobs develop gaps a few weeks after installation, once the boards finish expanding or contracting to match the room.
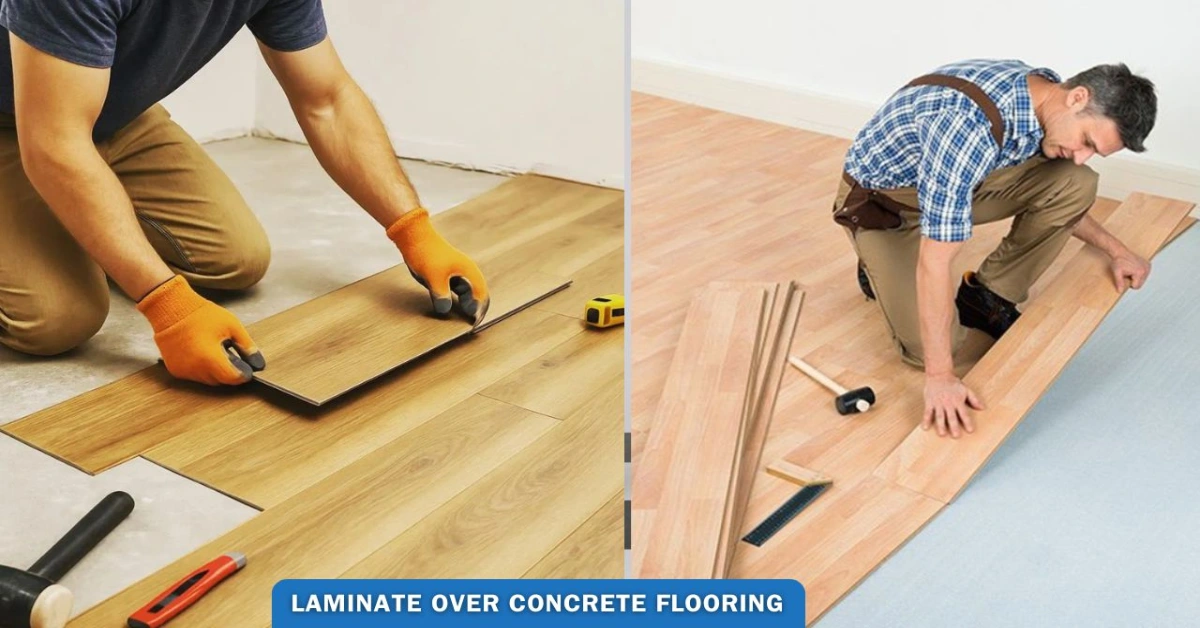
Step 6: Lay The First Row
Start in the corner furthest from the main doorway. Place 8–10mm spacers against the wall on both sides, then lay boards left to right, clicking the short ends together as you go.
Step 7: Continue Row By Row
Stagger the seams between rows by at least 30cm so they don’t line up — this is both a structural requirement (an aligned seam is a weak point) and what makes the finished floor look intentional rather than like sheets of paneling.
Step 8: Cut Planks For Edges And Obstacles
Measure twice before every cut around doorframes, vents, and corners. A jigsaw handles curved cuts around pipes or thresholds more cleanly than a utility knife.
Step 9: Fit The Final Row
The last row is usually the trickiest, since it rarely lines up with a full plank width. Use a pull bar to click the final boards into place without damaging the wall-side edge.
Step 10: Remove Spacers And Finish
Pull all spacers once the floor is fully laid, then install skirting boards or floor trim to cover the expansion gap. Give the whole floor a final sweep or vacuum before moving furniture back in.
Common Mistakes To Avoid
- Skipping the moisture test. This is the mistake that actually voids most warranties and causes the most callbacks.
- Installing without acclimating the planks. Gaps that appear a few weeks after installation almost always trace back to this step being skipped.
- No expansion gap at the walls. Laminate needs room to expand with heat and humidity; without it, the floor can buckle.
- Ignoring an uneven subfloor. Even minor dips telegraph through and stress the click-lock joints over time.
- Dragging heavy furniture across the finished floor. This is the most common cause of surface scratches in the first year — use felt pads and lift, don’t drag.
Maintaining Laminate Flooring In A UAE Climate
- Sweep or dry-mop daily — fine sand and dust are more abrasive on laminate’s surface layer than most people expect.
- Damp-mop only, never wet-mop; standing water is laminate’s biggest long-term enemy, especially at seams.
- Use felt pads under furniture legs and lift rather than drag heavy pieces.
- Place a mat at every entry point — it catches the sand and grit that causes most of the surface wear before it reaches the floor.
- If you’re also weighing tile or other options for wet areas like the kitchen, our UAE kitchen flooring comparison guide covers materials that handle spills better than laminate does.
Frequently Asked Questions
Can you install laminate flooring directly over concrete without any underlayment?
No — skipping underlayment is one of the most common installation mistakes. Underlayment provides the moisture barrier, sound dampening, and minor surface leveling that laminate’s click-lock system depends on to stay stable.
How long does laminate flooring last over a concrete subfloor?
Typically 15–25 years with correct installation and normal residential use, and often longer in a climate-controlled home. Skipping the moisture test or acclimation step is the most common reason a floor fails well before that.
Do I need a professional, or can I install laminate myself?
Laminate’s click-lock system is genuinely DIY-friendly for a motivated homeowner, but the moisture test and subfloor leveling are the two steps most worth paying a professional for if you’re not confident measuring them accurately — they’re also the two steps that cause the most expensive failures when done wrong.
What’s the difference between laminate and vinyl plank for a concrete subfloor?
Laminate has a harder, more scratch-resistant wear layer and a more convincing wood-grain texture, but it’s not fully waterproof — standing water at seams is its main weakness. Vinyl plank is fully waterproof and better suited to a kitchen or bathroom; laminate is generally the better pick for living rooms and bedrooms where looks and underfoot feel matter more than water exposure.
Why does my laminate floor make a hollow sound in some spots?
This usually means the underlayment isn’t sitting flush against the concrete in that spot, often because of a low point in the slab that wasn’t leveled before installation. It’s cosmetic rather than structural in most cases, but it’s worth addressing during installation rather than after, since fixing it later means lifting the affected boards.
Final Thoughts
Laminate over concrete is a proven, low-risk combination — the failures that give it a bad reputation almost always trace back to one of three shortcuts: no moisture test, no acclimation time, or an uneven subfloor. Get those three right and the installation itself is straightforward enough for a confident DIYer to handle over a weekend.
If you’re deciding between laminate and other flooring types for different rooms in the same renovation, our kitchen flooring guide breaks down the wetter-area alternatives worth comparing it against.