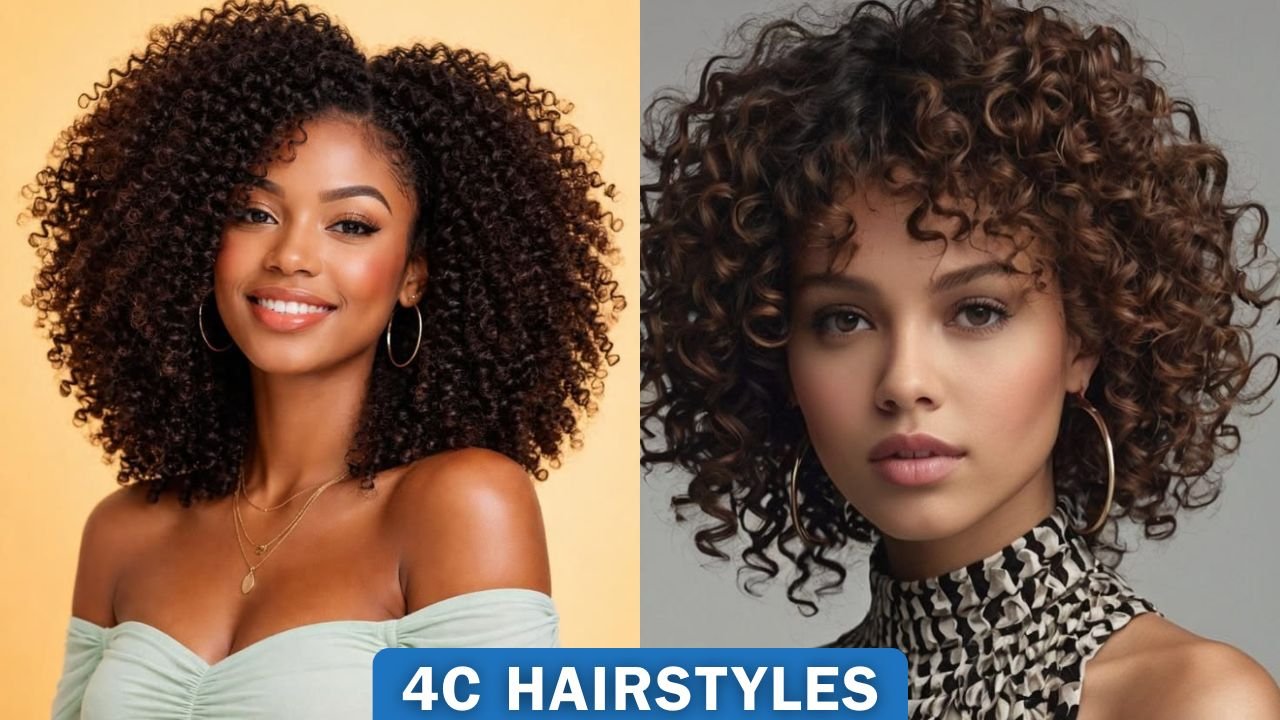
15 Best 4C Hairstyles for Natural Hair (Easy, 2026 Guide)
4C is the tightest, most tightly-coiled curl pattern on the natural hair typing chart. It’s known for serious moisture needs, dramatic shrinkage, and a lot of styling versatility once you know how to work with it rather than against it — which is exactly what this guide is for.
Below are 15 easy, low-manipulation styles you can actually maintain day to day, plus the care fundamentals — moisture, shrinkage, protective styling, nighttime routine — that make those styles hold up and keep your hair healthy long term.
What Is 4C Hair?
4C hair is the curl pattern with the tightest coil and the least defined curl shape — instead of one consistent spiral, it typically shows a mix of tight zigzags, coils, and waves along the same strand. That inconsistent pattern is also why 4C hair tends to be drier than other types: natural oils from the scalp struggle to travel down the hair shaft along all those bends, so the ends especially can end up parched and prone to breakage without consistent moisture.
4C vs. 4A vs. 4B: What’s the Difference?
All three are part of the same “type 4” family, and most heads of natural hair have more than one pattern mixed in. The rough distinctions:
- 4A has a defined S-shaped curl, roughly the width of a crochet needle.
- 4B has a sharper Z-shaped bend rather than a smooth curl.
- 4C has the tightest, least-defined pattern — often described as a zigzag with little to no visible curl definition until it’s stretched.
Porosity and density matter just as much as curl pattern for how your hair actually behaves, so don’t worry too much about getting the “exact” type right — the care principles below apply across the 4A–4C range, just with more intensity the tighter the coil.
In This Guide
- 4C hair care basics before you style
- 15 best 4C hairstyles
- How to protect 4C hair at night
- Common mistakes to avoid
- FAQ
4C Hair Care Basics Before You Style
A hairstyle only looks good as long as the hair underneath it is healthy. These four basics matter more for 4C hair than almost any other type.
How Often Should You Wash 4C Hair?
Once every 1–2 weeks is typical for most 4C hair, using a sulfate-free or co-wash formula — washing more often than that tends to strip moisture faster than you can replace it. Between washes, a light water-based refresh on days you wear your hair out is usually enough.
What Is the LOC Method, and Why Does 4C Hair Need It?
LOC stands for Liquid, Oil, Cream — applied in that order to damp hair. The liquid (water or a leave-in conditioner) hydrates the strand, the oil helps seal that moisture in, and the cream locks it all in place and defines the curl. Because 4C hair’s bends make it so hard for natural oils to travel down the shaft on their own, this layering does that job manually. Some people prefer LCO (swapping the last two steps) — try both and see which leaves your hair feeling less coated.
How Much Shrinkage Is Normal for 4C Hair?
A lot — up to 75% of your hair’s stretched-out length is normal for 4C hair. It’s worth knowing this isn’t a sign of damage or slow growth: hair grows at roughly the same rate for every curl type (around half an inch a month), 4C hair just coils back up tightly enough to hide most of that length day to day.
How Do You Prevent Single-Strand Knots?
Detangle with conditioner in the hair, always working in small sections from ends to roots, and finger-detangle before reaching for a wide-tooth comb on dry or unconditioned hair — that combination is what causes most single-strand knots in the first place. Keeping hair in a low-manipulation style between wash days also cuts down how often strands get the chance to tangle around each other.
15 Best 4C Hairstyles
Every style below works with 4C hair’s natural texture instead of fighting it, and none takes more than about 20 minutes once you’ve done it a couple of times.
1. Wash and Go
Best for: showing off your natural curl definition with almost no styling time. It’s the simplest style on this list in theory, but getting a clean wash-and-go on 4C hair takes the right product order: apply a leave-in and curl cream to soaking-wet, sectioned hair (not just damp), then let it air-dry or diffuse on low heat. Skip that step and the result usually reads more frizzy than defined.
2. Jumbo Topknot
Best for: keeping hair fully off your face and neck. Gather your hair at the crown, twist or coil it into a large bun, and secure with a scrunchie or soft-edged band. Smooth your edges down with a boar-bristle brush and a light gel for a cleaner finish, and leave a few baby hairs loose if you like that look.
3. Ponytail
Best for: a quick, everyday go-to. Gently detangle and smooth your hair back, then secure it loosely with a fabric-covered elastic — a band that’s too tight is one of the more common causes of tension around the hairline over time, so leave a little give.
4. Bantu Knots
Best for: a protective style that doubles as a heatless curling method. Section damp, moisturized hair into several parts, twist each section tightly, then coil it around itself into a small knot and secure at the base. Left in overnight and unraveled the next day, Bantu knots also give you defined curls with zero heat.
5. Twist-Out
Best for: defined, longer-lasting curls with real volume. On damp, moisturized hair, two-strand twist small sections from root to tip, let them dry completely (air-drying gives the cleanest definition, though it takes longer than a diffuser), then gently separate the twists once they’re fully dry — unraveling damp twists is what causes frizz, not the style itself.
6. Braid-Out
Best for: even more volume than a twist-out, with a slightly looser wave pattern. Three-strand braid small, damp, moisturized sections and let them dry fully before unraveling. Avoid brushing the finished style — it breaks up the curl pattern the braid just created.
7. Curlformers
Best for: long, uniform ringlets without any heat. Thread damp, product-coated hair through the fabric spirals, let it air-dry completely, then slide the Curlformers out — pulling them out before the hair is fully dry is the main reason this style sometimes falls flat.
8. Water Wave Magic Curls
Best for: a looser, beachier wave than Curlformers give you. The tool works the same way — damp hair looped through, left to dry — but the wider curl rod means a softer, more relaxed finish.
9. Perm Rods
Best for: tight, uniform ringlet curls on a budget. Wrap small, damp sections around each rod from root to tip, let them dry fully (a hooded dryer speeds this up considerably), then unroll and gently separate.
10. Roller Set
Best for: a stretched, elongated curl with real volume at the root — a good middle ground between a wash-and-go and a full blowout. Set damp hair on large rollers, dry completely, then finish with a hydrating serum on the ends once the rollers are out.
11. Pigtail Cornrows
Best for: a low-manipulation protective style you can do solo. Part hair into two sections and cornrow each one flat against the scalp into a single braid. Budget about 15 minutes if you’re doing your own — an experienced stylist will be faster.
12. Flat Twists
Best for: a neater, less bulky alternative to cornrows. Twist two strands flat against the scalp instead of braiding three, and either leave them hanging or gather the ends into a bun.
13. Messy Bun
Best for: genuinely no-effort days. Gather hair loosely at the crown or nape and secure — no smoothing required. A thin headband hides any flyaways at the hairline if you want a slightly more finished look.
14. Phony Pony
Best for: a sleek, elongated ponytail without heat-straightening your natural hair to get it. Slick your own hair into a low bun, then clip or tie a drawstring ponytail extension over it for instant length and a smooth finish.
15. Curly Clip-Ins
Best for: extra volume or length for a single event, with zero commitment. Section your hair strategically, clip in wefts that match your curl pattern, and blend the seams with your fingers or a wide-tooth comb.
How to Protect 4C Hair at Night
A cotton pillowcase pulls moisture out of your hair and creates friction that leads to frizz and breakage overnight — a satin or silk bonnet, scarf, or pillowcase is the single easiest upgrade for 4C hair. Before bed, lightly moisturize and either gather loose hair into a high, loose “pineapple” to preserve curl shape, or tuck protective styles fully under a satin bonnet.
Common Mistakes to Avoid With 4C Hair
- Detangling dry hair. Always detangle with conditioner in and hair damp — dry detangling is one of the biggest causes of breakage.
- Applying oil before your leave-in. Oil on its own can seal moisture out as easily as it seals moisture in — apply it after a water-based liquid, not before.
- Styling too tightly, too often. Constant tension at the hairline from tight buns, ponytails, or braids can lead to gradual hair loss along the edges over time — alternate your part and keep protective styles snug, not painfully tight.
- Skipping trims. 4C hair’s structure makes it the most prone to split ends of any curl type; a trim every 8–12 weeks prevents damage from traveling up the strand.
- Using only heat to define curls. Regular heat styling without protectant and proper technique gradually loosens and damages the curl pattern — reserve it for occasional use, like the short natural styles that work well blown out.
Frequently Asked Questions
It has a reputation for that, mostly because its moisture needs are higher and it tangles more easily than looser curl types — but with a consistent moisture routine and low-manipulation styling, it’s very manageable. Reputation aside, plenty of 4C-specific protective styles, like braided styles and Bantu knots, are genuinely low-effort once you’ve done them a few times.
No — hair grows at roughly the same rate for every curl type, around half an inch per month. 4C hair just shrinks up to 75% of its stretched length, which makes growth look slower than it actually is.
Occasionally, yes, with a heat protectant and a moderate temperature — but frequent heat styling is one of the fastest ways to loosen and damage a tight curl pattern permanently. Save heat for special occasions and lean on heatless methods like twist-outs and roller sets day to day.
Sulfates and drying alcohols at the top of an ingredient list both strip moisture that’s already hard to retain. Mineral oil isn’t harmful, but it shouldn’t be your only moisturizer, since it seals the hair shaft without actually hydrating it first.
Final Thoughts
Every style on this list takes less than 20 minutes once you’ve practiced it, which matters more than it sounds — the styles you actually stick with are the ones that fit into a real routine, not the ones that look best on day one.
Start with the care basics above before you worry about which style to try first. Moisturized, well-detangled hair holds a curl, a twist, or a braid better than dry hair ever will, whatever style you choose.
If you’re looking for more ideas beyond this list, our guides to short hairstyles for natural hair and Fulani braids are good next reads.